vSphere 6.7 was released on April 17, 2018 and I have been eagerly awaiting the ability to upgrade any one of my environments. It recently came to the decision of either upgrading to vSphere 6.5U2 or shooting straight to vSphere 6.7 as a result of support for a newer operating system. Additional benefits in vSphere 6.7 ended up winning out and I was greenlit to perform the upgrade!
It has to be said – VMware has continued to make this process easier and easier for the virtualization admin and the vSphere 6.5 to vSphere 6.7 upgrade is no exception. I was surprised to find that an upgrade to vSphere 6.7 was a migration instead of an in-place upgrade. I’ve already performed a migration of all my vSphere bits in the not-so-distant past (read about the experience: vSphere Migration – What I Did (Or Oh No… What Did I Do!?) and vSphere Migration – The Gotchas). I don’t think there’s anything wrong with the upgrade procedure. I just found it surprising that so much changed in just a dot release to require it.
The overall process has a pretty quick walk-through on vSphere Central (check it out here). It looks quick because, well… it is – especially when compared to the actual migration I’d done between versions before. The process linked is for an Embedded deployment upgrade but the External deployment upgrade process has only a few additional steps (like having to upgrade a sneaky Platform Services Controller).
Some caveats that I found:
I ran into a few snags which were mostly self-inflicted. To be honest, they were all self-inflicted except for one which never even amounted to a snag.
First:
In both Step 3: Connect to Source Appliance and Step 4: Appliance Deployment Target, I selected the ESXi host which was running my current vCenter Server. When deploying the vCenter Server Appliance, I found myself stuck at “Waiting for RPM installation to start.” as in the screenshot below.
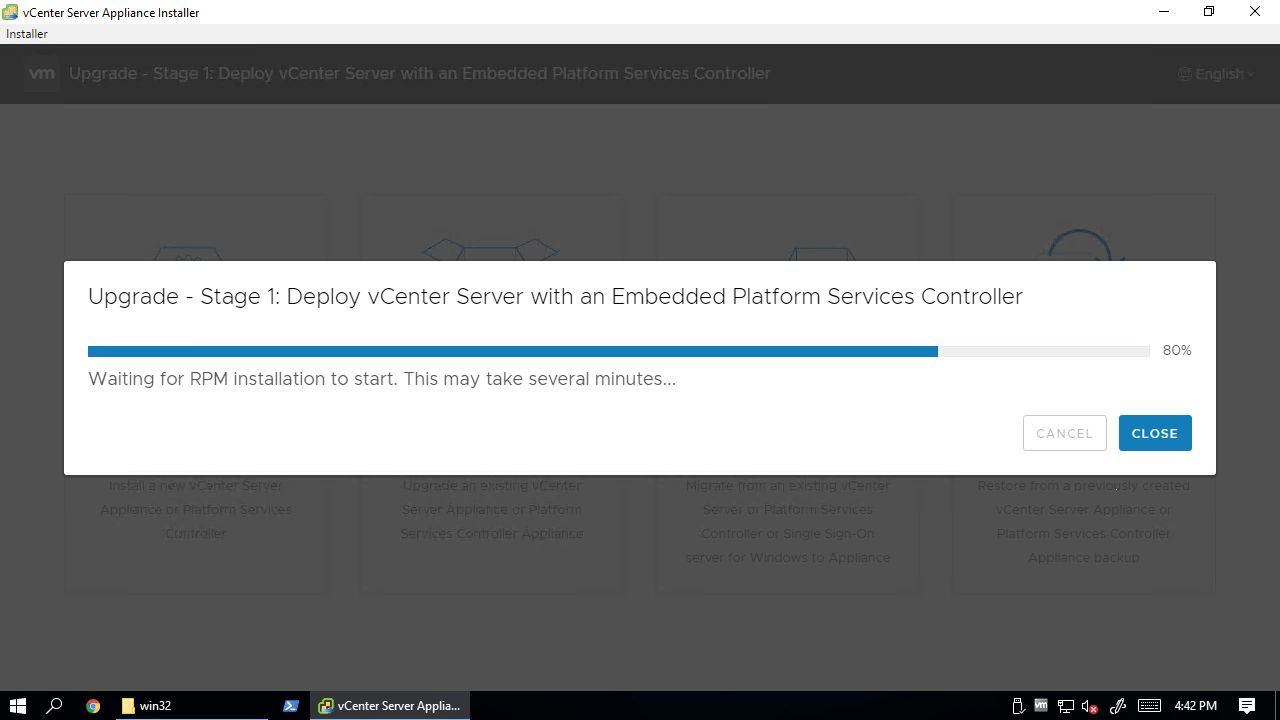
I logged into the staged appliance and found that RPMs had been installed. A quick cat /var/log/firstboot/status showed that the install had completed. Navigating to the VAMI (by temporary IP as FQDN had not been set) re-launched the configuration wizard. I did some research to find that the new appliance had vMotioned to another host in my Management cluster. The note that I missed was that DRS should be disabled when deploying directly to an ESXi host.
Second:
Resuming the Upgrade and starting Stage 2 eventually had me running pre-upgrade checks which failed. They failed because I didn’t follow the upgrade order. The error given to me was that I needed to first upgrade my external PSC. Truth be told, I had completely forgotten that this environment had been built this way. Onward to upgrading the PSC!
Third:
Pre-upgrade checks for the PSC failed as my root account password had expired. It’s been a while since I’ve logged into the PSC appliance itself. I reset the password. At some point, I locked myself out by fat-fingering the new password and had to reset it via GRUB. Upon reboot, I realized that I hadn’t reset the lock on the root account and again needed to unlock the account via GRUB. It was a frustrating few minutes.
Fourth:
Re-running pre-checks on the PSC upgrade succeeded but I somehow found myself in the VAMI of the to-be-upgraded PSC. I noticed that the Overall Health was reporting as critical with the message The /storage/core filesystem is out of disk space or inodes. I logged in to confirm with a quick df -h that I was indeed at 100% utilization.
I can never remember which of the several disks are associated with the various number of items. Using this phenomenal post I was able to expand this disk with ease and move forward.
Note: Pre-checks did not catch this as an issue but I was not comfortable moving forward without fixing it first. This was the only issue that wasn’t caused by me.
Fifth:
After my PSC was successfully upgraded, I went to finish the VCSA upgrade but found that I needed to re-authenticate. I again fat-fingered my password and needed to perform the same steps as above (including the second entry to GRUB…) before proceeding.
Sixth:
This one isn’t even a caveat, but was a pleasant surprise!
Once pre-upgrade checks passed, I found that my estimated time to complete the migration was a total of 47 minutes of downtime which fit into my allotted maintenance window.
I found that my new vCenter was online and ready to log into in under 20 minutes! This allowed me to actually verify and test a handful of things before throwing vCenter back to the wolves.
*Update – 6/22/18* Seventh:
After a few hours of soak time it was discovered that some of the custom Alarms which were created in the original vCenter were transferred to the upgraded appliance. I just double-checked the Release Notes to make sure that I didn’t miss a known issue. I was unable to find any reference to this but will continue to do research.
To wrap up:
This upgrade process was really, really simple and completed mostly without flaw. The wounds that I felt were all self-inflicted which is very different than upgrades that I’ve done in the past. I have to say it again: VMware has continued to make this process easier and easier for the virtualization admin. Alas, this was just the first step of the vSphere upgrade. If I run into any issues upgrading ESXi hosts, I’ll be sure to power a follow-up.
It is amazing to me that you consider that a simple upgrade. A simple upgrade would be clicking on the Update manager tab in vCenter and then click an update vCenter button.